Maple Sap Science
Maple Sap Science
Capillary Action & Crystallization Experiment for Ages 8-15 (or younger with grownup help)
By Nicole Rhodes, MAT, Lead STEM tutor
Learn how to harvest maple sugar and about the physics of capillary action. Make maple candy and explore the chemistry of crystallization with this Community Classroom Experiment Kit To-Go (available for purchase and pickup at The Community Classroom)

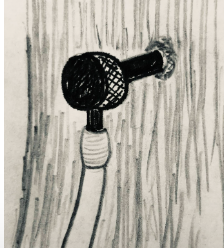
Click the image above to watch Lead Tutor Nicole Rhodes demonstrate these experiments live on WWLP News Channel 22’s Mass Appeal.
Part 1: How does sap flow in Maple trees?
In early spring, sap starts flowing in maple trees to send nutrients to the buds that will form flowers and leaves. Sugar maple trees have the highest sugar content in their sap, but you can also tap other maple species. Maple trees use capillary action to move their sap against gravity to the top of the tree. You may have seen this happen when you place a stalk of celery into water with food coloring. Water sticks to the inner walls of the tiny “tubes” in the celery, and the water molecules can “climb” to the top, making the leaves turn the color of the food coloring. All plants do this to send water through their tissues, but maples are unique in that they have gas, instead of water, filling their xylem (transport tissue) in the winter–this prevents maple trees from turning into icicles! When it is cold, the gas inside the tree tissue contracts, making space for the sugary sap to travel up the roots and into the tree trunk by capillary action. Once the tree grows leaves, gas will be released through the leaf pores or stomata.
You can catch some of this sugary sap as it travels up the tree with a spile (a fancy word for a sap spout). The sap contains a lot of water and only a little maple sugar. The weather is just right for tapping when temperatures are below freezing at night and above 40 degrees Fahrenheit during the day. Once you collect sap, you will need to evaporate the water to get the maple syrup that you are familiar with on pancakes. Maple syrup is so concentrated that one small tree might only yield enough syrup for one pancake breakfast!
Materials
- Maple tree spile and tube
- Hammer
- Drill & 5/16” bit
- Large water jug or bucket
- Observation chart

STEP 1: Find a maple tree that is at least 12 inches in diameter. How do you do this when there are no leaves on the trees? Luckily, all maple trees have the same pattern in their branches. All maples have opposite branching, meaning where one branch is growing another branch should be growing on the opposite side of a branch (like the top of a T). The buds at the tip of each branch should also be pairs (see image). It is easiest to see this on young branches.
STEP 2: Have an adult drill a small hole 2 to 3 feet off the ground on the sunny side of the tree, with a 5/16” drill bit. Place the black plastic tube of the provided spile into the tree and lightly hammer it into place. If the night before was cold, sap should start flowing right away. Put the opposite end of the tube into a clean bucket (a clean empty water or milk jug works well). You can watch a video of this process below.
STEP 3: Check the bucket daily for sap. It is optional to use a coffee filter or fine sieve to strain the sap into a clean jar and store it in the refrigerator until you are ready to make syrup.
STEP 4: Have an adult help you boil the sap in a saucepan on the stove. Maple syrup is concentrated maple sap, meaning most of the water was removed and the sugar remains. Be sure to stir often once the syrup becomes more concentrated to prevent burning. Maple sap contains three different sugars – sucrose, glucose, and fructose–as well as several other nutrients that give it its unique and complex flavor.
Part 2: How do crystals form?
Crystallization is a physical change, where sugar molecules separate themselves from the rest of the liquid and form solid, crystalline particles. Rock candy is made by dissolving sugar in hot water until the water is supersaturated (with more sugar than water can dissolve at room temperature). As the solution cools, sugar molecules will separate from the water and stick to other sugar molecules, forming solid crystals. Maple syrup contains sugar, which is a solute, and water, which is the solvent, to make a homogeneous solution (the same throughout). Since the water and sugar of maple sap are in the solution, we must crystalize it to remove it from the water and make maple candy. Heating the maple syrup concentrates the sugar, so the solution becomes supersaturated.
When we cool it quickly by drizzling the concentrated syrup on a cold baking sheet, we force crystals to form. The more crystals, the more crunchy and hard the candy is. You can change the texture of the candy by changing the concentration of sugar. When you think about your results, you can compare the texture of other candy you have eaten–lollipops are hard and brittle (they are cooked to 99% sugar concentration), while fudge is chewy (the sugar is cooked to 85% concentration).
Materials
- Maple syrup
- Candy thermometer
- Metal pie plate (don’t use glass, as the sudden temperature changes can cause it to crack!)
- Vegetable oil
- Stove
- Saucepan
- Large metal spoon
- Small Metal Spoon
- Hot mitts
- Observation chart
STEP 1: Lightly grease your metal pie plate with vegetable oil and place it in the refrigerator to cool.
STEP 2: With an adult’s help, gradually heat the maple syrup in a small saucepan, uncovered and on low heat. Wear a hot mitt and stir often with a metal spoon. Carefully use the thermometer to measure the temperature as you stir.
STEP 3: When the syrup reaches 230-235°F, use a metal teaspoon to carefully scoop out approximately one teaspoon of syrup and pour it onto the cold pie plate. Note where you poured the syrup, and return the pie plate to the refrigerator.
STEP 4: Continue to heat the syrup, this time waiting for it to reach the following temperatures: 245-250°F, 255-260°F, 270-280°F and 300-310°F. At each temperature range, repeat step 3, by taking a sample of hot syrup. Be sure to chill the pan between samples. Keep track of which candy came from which temperature sample, and record your observations in the included chart.
STEP 5: Sample your candy, and record your observations in the included chart. What was the color, sweetness, texture, and overall taste of each sample? Why do you think that is? What questions do you want to research further? How might you change this experiment if you were to do it again?
Did you know The Community Classroom is now selling Science Experiments To Go? We’ll be selling this kit and others like it at The Florence Farmers’ Market starting in May of 2024 or online here.

For more information:
- https://montanahomesteader.com/how-to-tap-trees-and-make-syrup-in-your-backyard/
- https://www.caryinstitute.org/news-insights/feature/learn-about-science-maple-syrup
- https://sites.middlebury.edu/middland/2014/04/08/the-botany-of-syrup/#:~:text=In%20maple%20trees%20the%20space,benefit%20of%20transpiration%20from%20leaves
- https://botanistinthekitchen.blog/2013/03/18/maple-syrup-mechanics/
0 Comments